Eco-friendly, natural texture, simple construction, lightweight material, modern design, 3D shape, elegant and minimalist style, sound-absorbing and heat-insulating, durable and beautiful, impact-resistant, flame-retardant—this is truly a 100% green product.
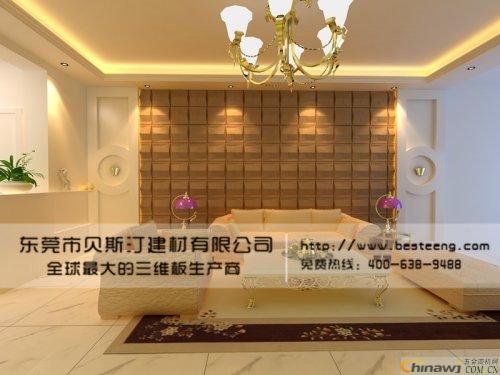
The 3D board is an innovative interior and exterior wall decoration panel that offers a realistic 3D effect. Its sleek and minimalistic design allows for easy combination of individual panels, flexible coloring options, and creative decorative possibilities. The 3D board comes in two generations. The second generation improves upon the first by using environmentally friendly composite materials, making it suitable for both indoor and outdoor use. It is fire-resistant, washable, and can be used in its natural color or customized with DIY paint, achieving a striking 3D relief (approximately 25mm high). It’s easy to cut, install, and combine different panels to create a personalized, artistic look.
**Key Features of 3D Board:**
1. **3D Shape:** Creates a stylish and elegant spatial atmosphere.
2. **Lightweight Material:** Easy to handle, install, and clean.
3. **Flexible Design:** Free to combine and color, reflecting the owner's personality.
4. **Safe & Eco-Friendly:** No formaldehyde, odorless, waterproof, and fire-resistant.
**Installation Guide**
**Step 1: Preparation**
- Ensure the wall surface is smooth and flat. If using putty, plasterboard, or wood, mark horizontal and vertical lines to avoid uneven placement.
- Gather tools: double-sided foam tape, silicone adhesive, nail-free glue, utility knife, measuring tape, pencil, angle grinder, and more.
**Step 2: Panel Preparation**
- If painting, lay the panel flat and apply thin coats of paint, spraying multiple times for the best result. Professionals can use an air compressor spray gun. Paint all panels before installation.
**Step 3: Attaching the Panels**
- For temporary installation, use double-sided foam tape for quick and easy application.
- For permanent installation, use structural silicone or nail-free adhesive. Apply foam tape on the four corners and a glue strip along the edge. After placing the panel on the wall, fill the seams with glue and attach the next panel using the same method, similar to installing aluminum composite panels.
**Step 4: Cutting the Panels**
- If the panel size doesn’t fit, draw the cutting line with a pencil, then carefully cut using a utility knife or hook knife. Make multiple passes to deepen the cut, and use scissors to keep the line straight. Finally, smooth the edges with a utility knife or angle grinder.
**Step 5: Application Areas**
- Ideal for home renovation, KTV back walls, retail store displays, and special background effects.
For more information, visit [http://news.chinawj.com.cn](http://news.chinawj.com.cn)
Submission:
 Submission: